How To Be An “Archive Raider” Without Getting Sore
While not all food studies students work in archives, some of us do. These tips are for you. I likely take too many photos in the archives, but this setup below it’s pretty handy when you need to be what Konrad M. Lawson calls an “archive raider.” In a 2010 post in the Chronicle, Lawson shows how to use camera equipment to build an articulated arm that holds your, ummm, camera. Very 2010. I’ve slightly updated this approach.
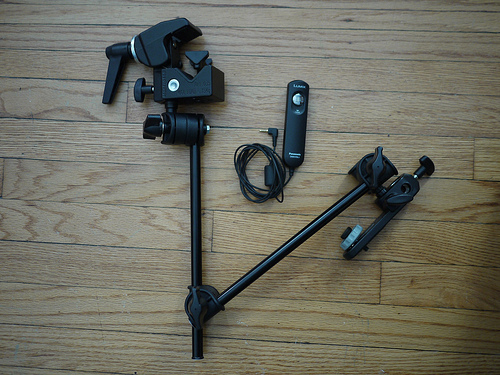
I still use the main parts of Lawson’s system, a clamp and an articulated arm. They are both made by photo equipment manufacturer Manfrotto:
- Manfrotto 035RL Super Clamp with 2908 Standard Stud (around $30)
- Manfrotto 196B-2 143BKT 2-Section Single Articulated Arm with Camera Bracket (around $40)
Here’s what those two pieces look like (plus the camera remote that Lawson uses):
To that I added:
- Joby GripTight Mount (around $20)
- [pro]master Selfie Remote (around $20)


I’d recommend that you buy at least some of this through a camera store and have them show you how to put it together, as some of the ways the arm attaches to the clamps or the mount aren’t obvious immediately. Once you put it all together, it looks like this. Now you can either use your camera to take pictures quickly in the archive, using the remote to avoid having to tap the camera and cause blurry images.
Even better is to get the pro version of the phone app CamScanner (about $4 a month) to make named, tagged, multi-page pdfs. The site is a bit opaque about how it works, but basically you can crop images, then edit them together into pdfs (which you can rename and tag), then upload direct to your Dropbox account. It makes archival raiding easy, as long as you can get the archive to let you use your articulated arm. You might try to plead bad wrists, or even get a note from a doctor.


Left: A close-up of the clamp attaching to the desk.
Right: A view from above. Notice the little remote in the lower left. It connects to the phone via the Bluetooth settings.
